


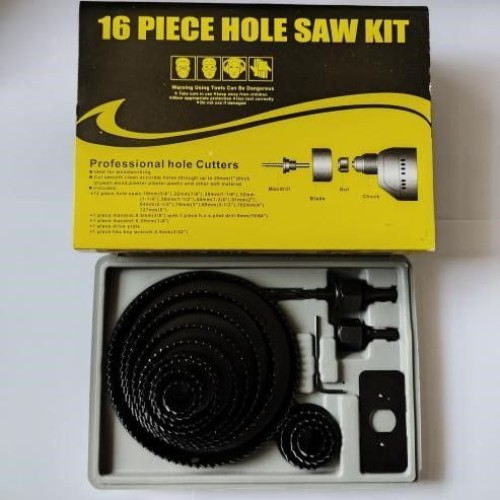


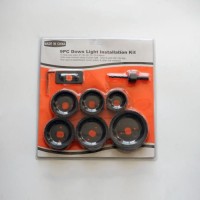
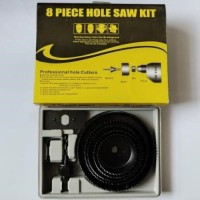
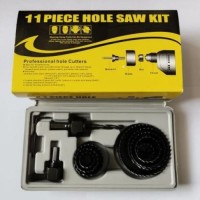

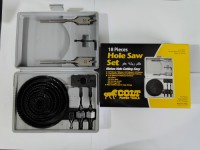
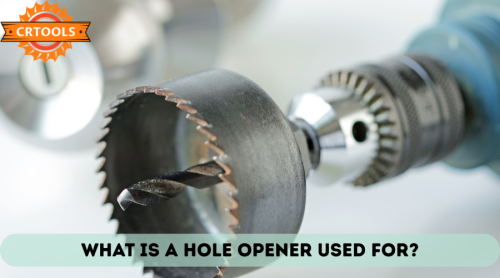
A hole opener (aka reamer) is a drilling tool that widens a pre-drilled hole and increases its size. It is mostly used in mining. The importance of hole openers is as follows: Efficiency in drilling operations Cost savings Improved Stability of Boreholes Adaptability across industries Customization and versatility Support for Large-Scale Infrastructure Projects However, the applications for hole openers are as follows: Oil and gas industry Water well drilling Mining operations Construction and infrastructure Pipeline and utility installation Geothermal energy projects Environmental and Geological Exploration Difference Between a Hole Opener and a Drill Bit A hole opener enlarges a pre-existing hole, while a drill bit builds an entirely new hole. Common Types of Hole Openers Roller Cone Hole Openers These hole openers are used the most. They contain more than one rolling cone with tungsten carbide inserts or steel teeth. They specialize in drilling into hard rock formations and mixed ground conditions. PDC (Polycrystalline Diamond Compact) Hole Openers PDC hole openers have PDC cutters. This type of hole opener is also famous for drilling into rigid rock. However, they perform their function very fast. Underreamers Underreamers widen the depth of a material. In simple words, it widens a pre-drilled material, but deep inside it. How Does a Hole Opener Function? A hole opener connects to the end of a drill pipe and follows a pre-existing (pre-drilled) hole. Then it scrapes away the rock or dirt around that hole. All this happens with the help of a spinning blade. Parts of a Hole Opener The body is the middle structure of the hole opener. It is built of robust alloy steel, which is made to bear heavy pressures and high torque during drilling. Cutters The function of the cutters is to cut down, break, or crush rock to widen boreholes. They can use anything such as roller cones, PDC cutters, or drag blades. It all depends on which type of hole opener you are using. Pilot Bit The pilot bit is attached at the bottom mid-part of the hole opener. First, it makes a small hole. Then it guides the hole opener to follow it to drill further to widen a borehole. Bearings Bearings are mechanical supports that exist internally in roller cone cutters. They enable the roller cones to rotate without any restriction or friction. Key Applications of Hole Openers Oil and Gas Industry Hole openers are an essential tool for drilling in the oil and gas industry. This tool drills a pre-existing hole and enlarges it. This happens so that larger pipes and other equipment can enter the well. Let us explain how they are used: Enlarging the Hole: Before the hole opener can be put into the casing, that line of the well, it is very important to enlarge the hole enough. Drilling Deep: In very deep wells, different parts of the hole require different widths. In this case, hole openers do this job, which saves money and time. It also saves the effort of drilling the whole hole once again. Offshore Drilling: In offshore projects, drilling is very difficult and expensive. In this case, hole openers do this job efficiently. In simple words, hole openers are important in the oil and gas industry because they: Enlarge boreholes for installing pipes. Help keep the well strong and stable. Minimize drilling expenses and pressure on the rig. Support efficient drilling in offshore projects Mining Sector Exploration Drilling When firms are looking for minerals, they first drill small holes to find out if there is any ore in there. Once they find out that there is some ore in there, they use a hole opener to enlarge that hole. This way, they can take some more samples to take a closer look at the mineral deposit. Blast Hole Preparation In mining, both on the surface and underground, explosives are placed to blast the rock. In this case, hole openers are used to create a hole. So that explosives can be placed underneath it to make the blast properly. Geothermal Drilling Hole openers are pivotal for geothermal energy projects. They are used to drill big and wide holes under the ground. However, they do this to reach the underground heat sources. Reasons Why They are Very Useful Making Room for Equipment: To get steam or hot water to the surface, one needs to fit large pipes and other heavy equipment. For this purpose, it is very important that the hole is wide enough. For this purpose, we use hole openers. Saving Cost and Effort: Rather than making a huge hole in the beginning, the drilling teams drill a smaller hole first. This happens with the help of a hole opener. This method costs less. Creating a Smooth and Stable Well: Hole openers not only widen a hole, but they also smooth the sides of the hole. Breaking through Hard Rock: geothermal projects often require drilling through very hard rock. Hole openers do this job efficiently. Water Well Drilling Widening Pilot Holes for Well Casings In water well drilling, a small pilot hole is normally made first. Then one uses a hole opener to enlarge that hole. So that the hole is large enough to put well casings into it. Improving Water Flow Capacity By making the boreholes bigger, hole openers make it possible to put bigger pipes and screens into them. The wider the well, the finer the water flow. This water flow is pivotal for farms, cities, and factories. Accommodating Pump Systems To receive water from modern wells, one needs to fit in pumps of different sizes. In this situation, hole openers are used to make sure the well’s hole is big enough. So that these pumps and other equipment can be fixed inside without any difficulty. Enhancing Well Longevity By making the drill hole the perfect size, a hole opener helps the pipes that go inside install without any strain. It also prevents them from getting stuck. The hole opener smoothens the surroundings of the hole. Supporting Geotechnical and Environmental Needs Besides getting water, hole openers are used in well drilling to drill holes for keeping an eye on the wells, groundwater studies, and environmental examining. The holes are drilled to take measurements for the installation of equipment. Horizontal Directional Drilling (HDD) & Infrastructure Hole openers are very important in horizontal directional drilling (HDD). It is a method that is used to fit components such as pipelines and cables underground. This happens with the help of a hole opener without the help of digging up the entire ground. Let us explain how they are used: Making Space for Pipes: In HDD, a small pilot hole is drilled first. After that, the hole opener follows the hole to enlarge it. So that the pipe or cable can be pulled through without any difficulty. Adapting to Different Ground: Hole openers are invented to work in all kinds of grounds. Now, whether that is medium-soft dirt or hard rock, it does its job efficiently. It is an amazing tool to use (especially in cities, where you can’t touch the existing pipes or roads, otherwise, it would disturb the whole commuting system). Building Vigorous Foundations: Hole openers are also very important in other construction projects. Some examples are constructing bridges and tall buildings. Hole openers widen the holes so that those projects can be built strong enough not to fall. Benefits of Using Hole Openers Efficiency in Enlarging Boreholes Hole openers are very efficient and safe in enlarging boreholes. Cost-effectiveness Compared to Multiple Drilling Runs Hole openers are lower in price than multiple drilling runs. It is due to a number of reasons. Compatibility with Different Formations Hole openers are compatible with a number of formations. In simple words, they can be used in different projects. Durability and Reusability Hole openers are very durable due to their strong body and are reusable. So that the user can use it as much as they want. Materials and Design Considerations Common Materials Used in Manufacturing Hole openers are invented to drill through hard rocks, etc. That is why they are built with robust materials. Some of the most common materials are: Alloy Steel Tungsten Carbide Polycrystalline Diamond Compact (PDC) Hardfacing Materials Design Features (replaceable cutters, stabilizers) Advanced hole openers are made with specific attributes to improve their functioning and performance: Replaceable Cutters: Numerous hole openers are made with cutters that are replaceable. Stabilizers: Some designs have stabilizer arms or pads. They keep the tool centered in the borehole. This improves accuracy and minimizes vibration while functioning. Importance of Opting for the Correct Size Just like the material and design are very important, opting for the right size of a hole opener is also pivotal. If the hole opener size is not correct, it can lead to borehole collapse. Main points are: Pilot Hole Compatibility: The hole opener should be the correct size according to the pilot hole. Otherwise, it will put too much stress on the drill string. Project Requirements: In HDD, oil and gas, or construction, the enlarged borehole must be big enough to accommodate casings, pipelines, or foundation elements. Formation Considerations: Larger sizes are needed for soft rocks. While the harder rocks may require smaller drill bits. This secures the tool from getting damaged and boreholes from becoming unstable. Equipment Capacity: The drill rig’s torque and pullback capacity must be equal to the hole opener’s dimensions to avoid mechanical issues. Things to Keep in Mind When Opting for a Hole Opener Formation Hardness See whether the rock is hard or soft. Then, choose the hole opener type according to that. Borehole Size Requirements No matter whether the borehole is big or small, choose a hole opener according to that size. Rig Compatibility The hole opener should be compatible with the drilling rig being used. The tool should match the rig’s characteristics. Cost vs. Lifespan If you select a hole opener that is initially cheap, then here is what will happen: It will be like a disposable razor, cheap at the beginning, but it will get dull quickly. A hole opener is also like this. If it is inexpensive in the beginning, it won’t serve you well. On the other hand, if you source an expensive hole opener at the beginning, it will cost you a lot, but it will serve you optimally. Its lifespan will be long-lasting. Safety Considerations Safety is crucial in everything. If you opt for a bad hole opener, it will cause vibration or tool breakage. All these things become the cause of any possible accidents. Conclusion A hole opener is a tool that enlarges a pre-drilled hole. It is used in a number of projects. Its importance is in multiple industries. However, if you are thinking about buying a hole opener, consider the right type. Why? Because different drilling operations require different types of hole openers.